Use this page for reference if you are building a tumbler from our
CNC files. If you have not yet purchased the file, you can do so
here: dxf files for sale
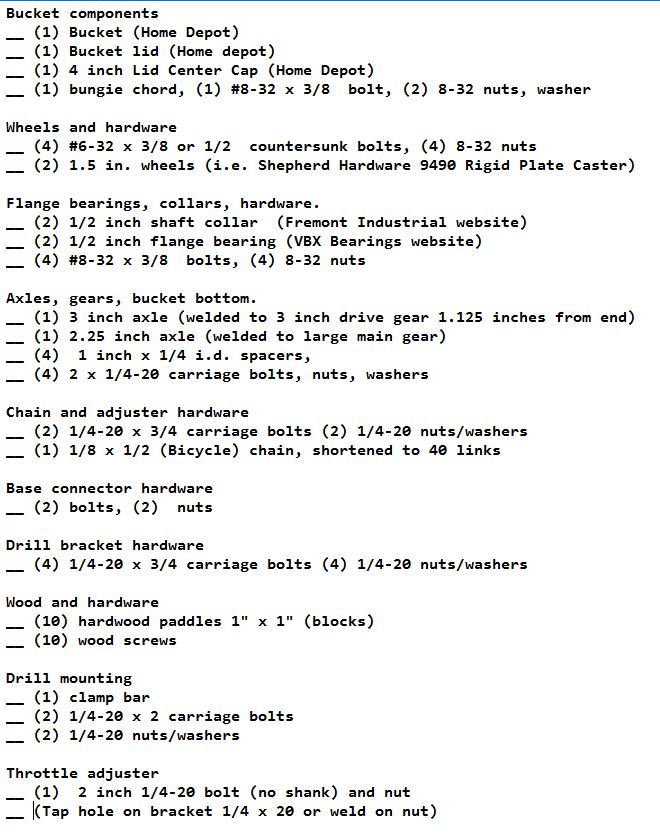
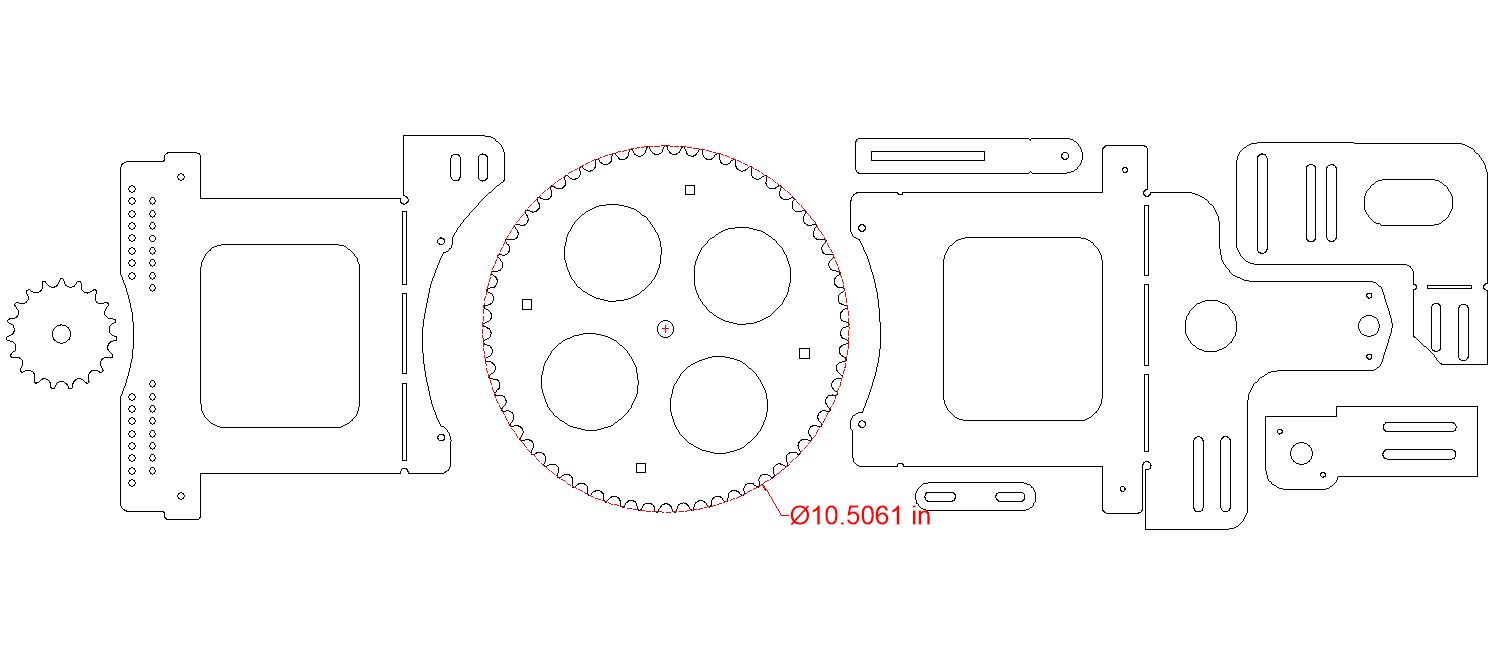
Material required: 11 ga. steel 12 x 48
inches.
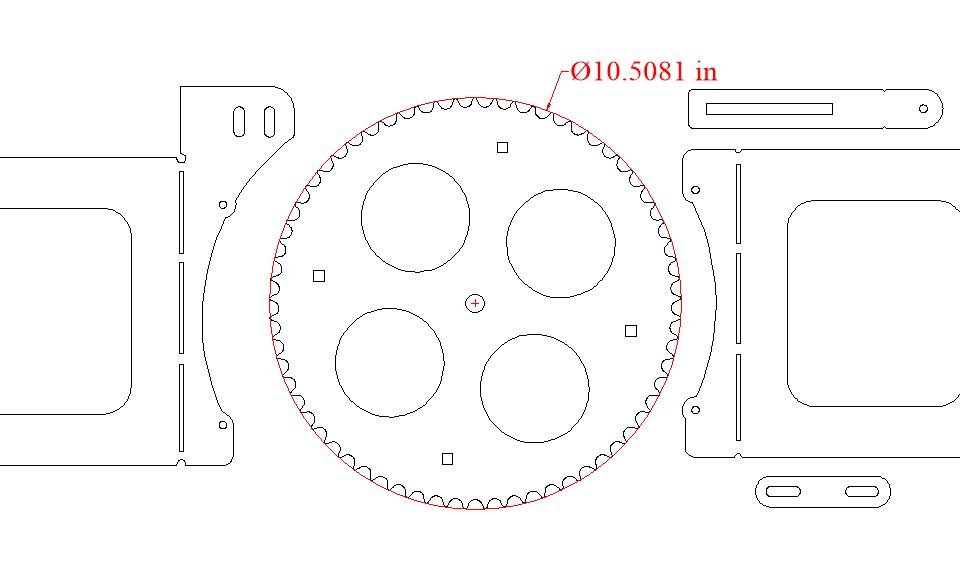
Scale: the large gear is 10.5 inches
diameter
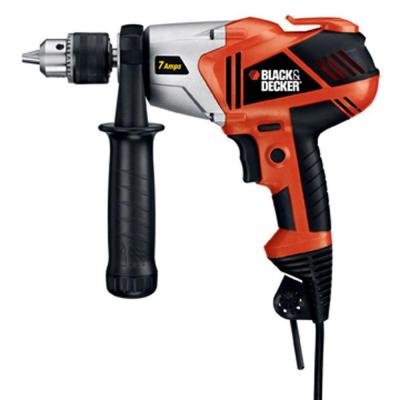
DRILL:
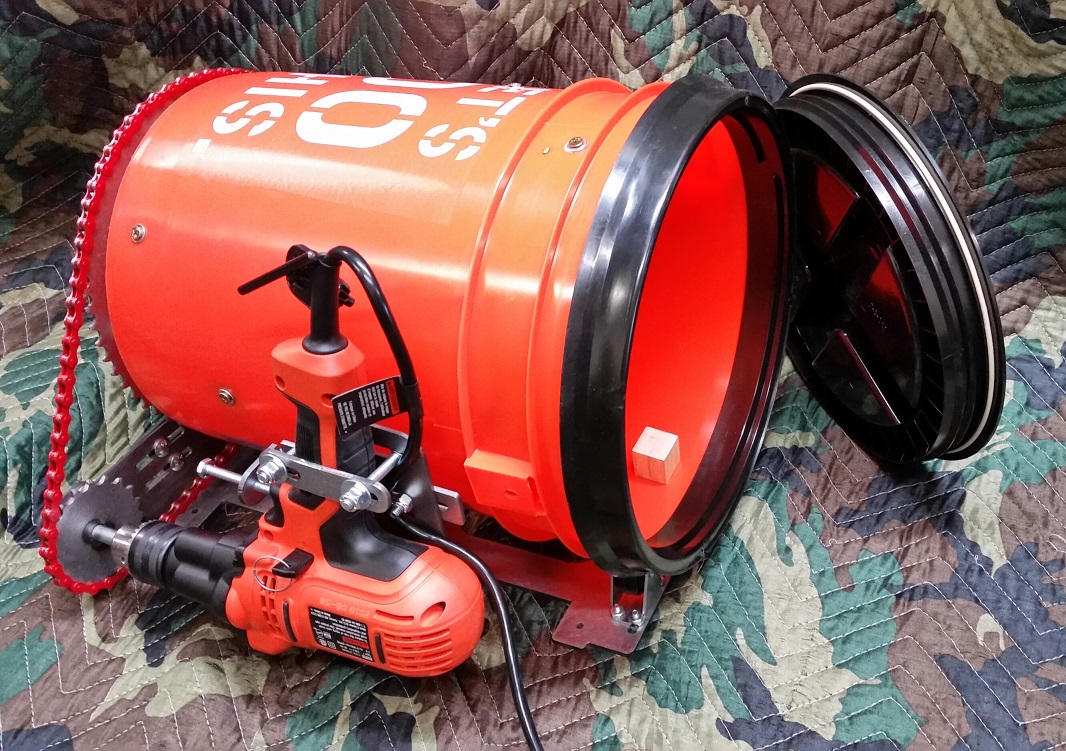
Black and Decker 1/2 inch High Torque Heavy Duty Electric Drill
(Home Depot or Amazon)
Bucket (Home Depot)
Bucket
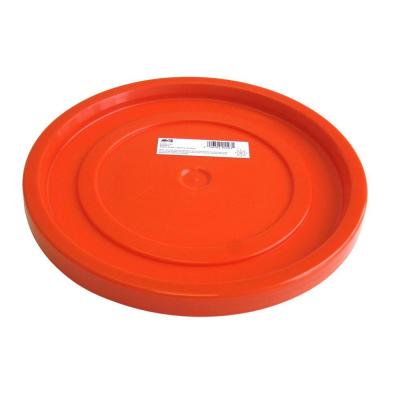
lid (Home Depot)
Lid
center cap is a plumbing 6 inch 'test cap' (Home depot). We
used a small bungee cord to secure the cap.
Bucket lid (optional). You can also use
this 'screw-off' lid in place of the common lid and 'test cap'
(above)
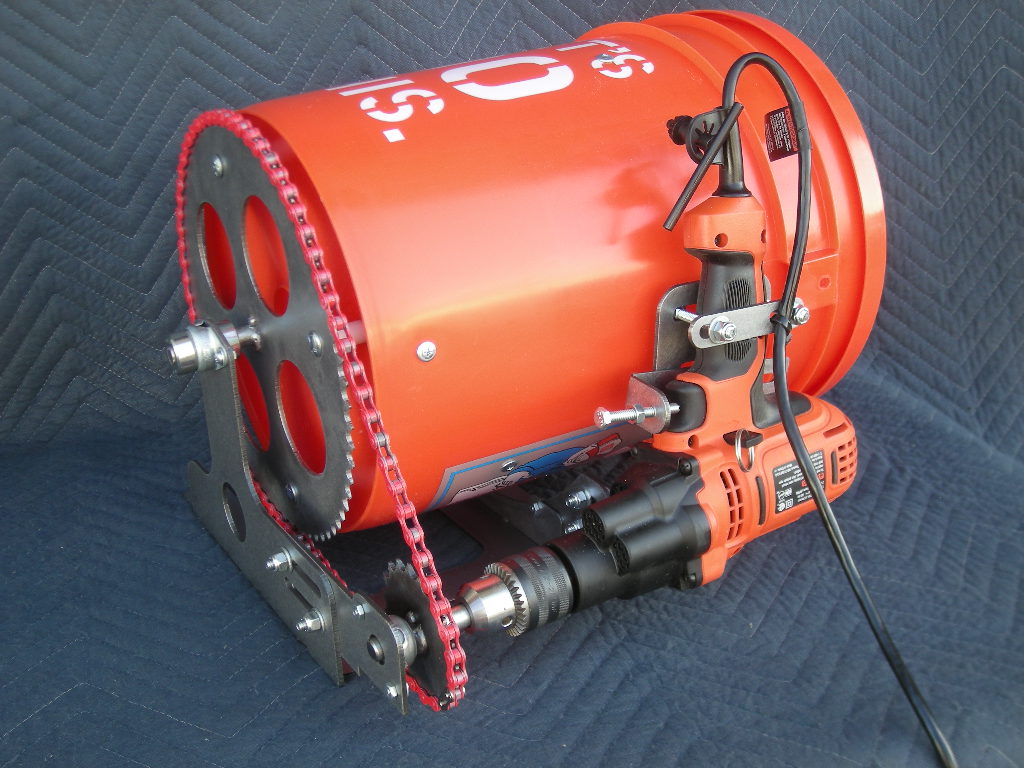
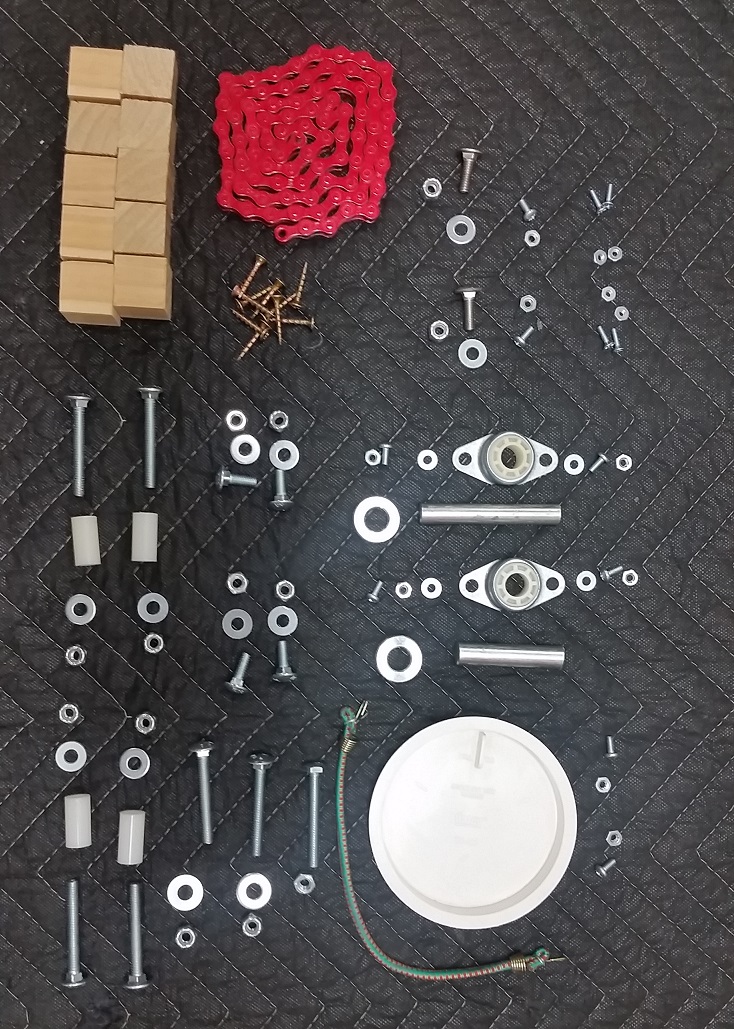
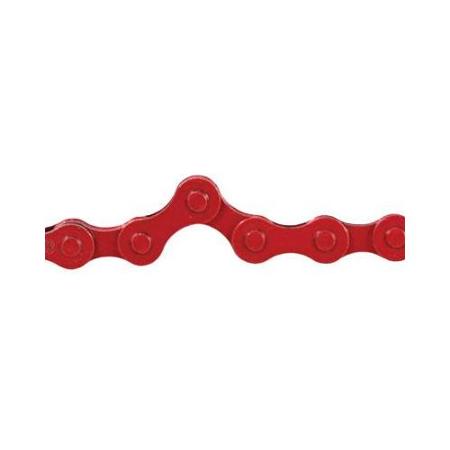
Drive chain: Common 1/2 x 1/8
single speed bicycle chain (Walmart).
Wooden 'paddles' (bucket interior). 1 x 1 inch wood blocks
and screws. Pre-drill the blocks and use a drop of wood glue to seal
the screws.
10 inch gear axle assembly.
Weld a 1/2 inch diameter x 2-1/4 inch long axle to center (1/2 inch
bolt shank, buy a long 1/2 inch bolt and cut off the head and
threads)
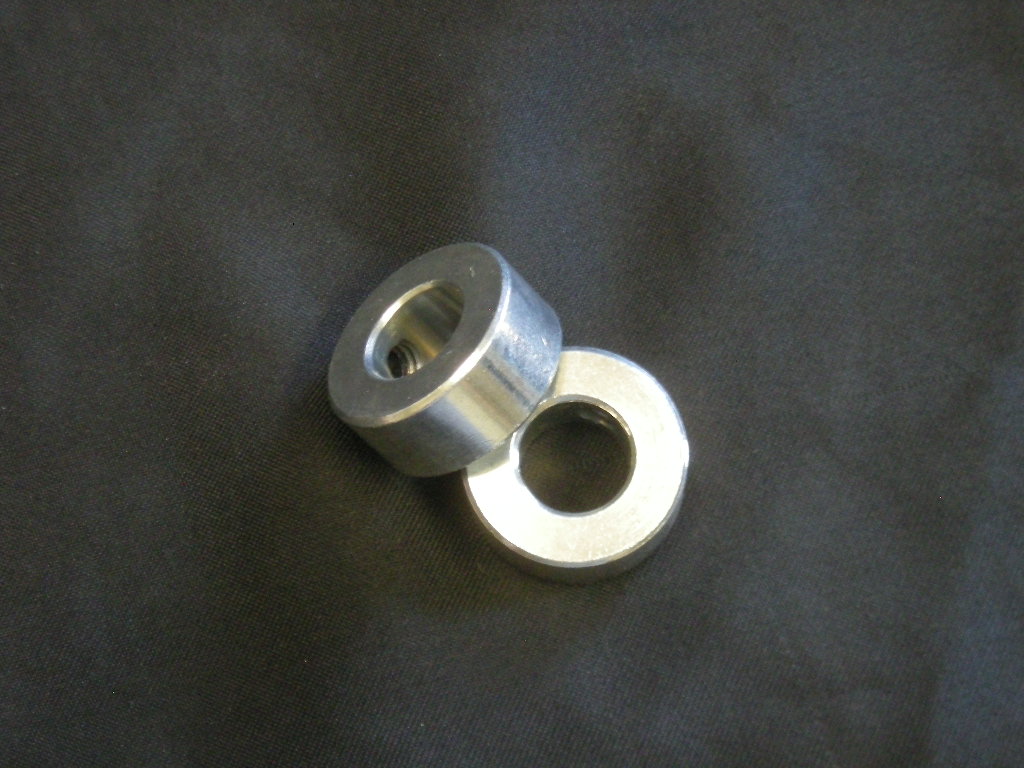
(4)
1 inch x 1/4 inch i.d. Nylon spacers (Home Depot) and (4) 2 x 1/4-20
carriage bolts, nuts and washers mount the large gear to the bucket.
Center the gear carefully, use the gear holes to mark the bucket
bottom for drilling the mounting holes.
(2) 1/2 inch
"miniature side flange bearing" (VBXbearings see:
http://www.vxb.com/page/bearings/PROD/Kit8995). Use (4) #8 x 3/8
(or 1/2 long) bolts, nuts and washers to mount these bearings.
Bucket bearing mount (base section, rear)
(2) roller guide wheels
and #6 mounting hardware
2 of Shepherd Hardware 9490 (or similar) 1-1/2-Inch
Rubber Rigid Plate Caster, 40-lb Load Capacity Sold by: Amazon.com,
eBay, Home Depot
Wheel mount (base section, front)
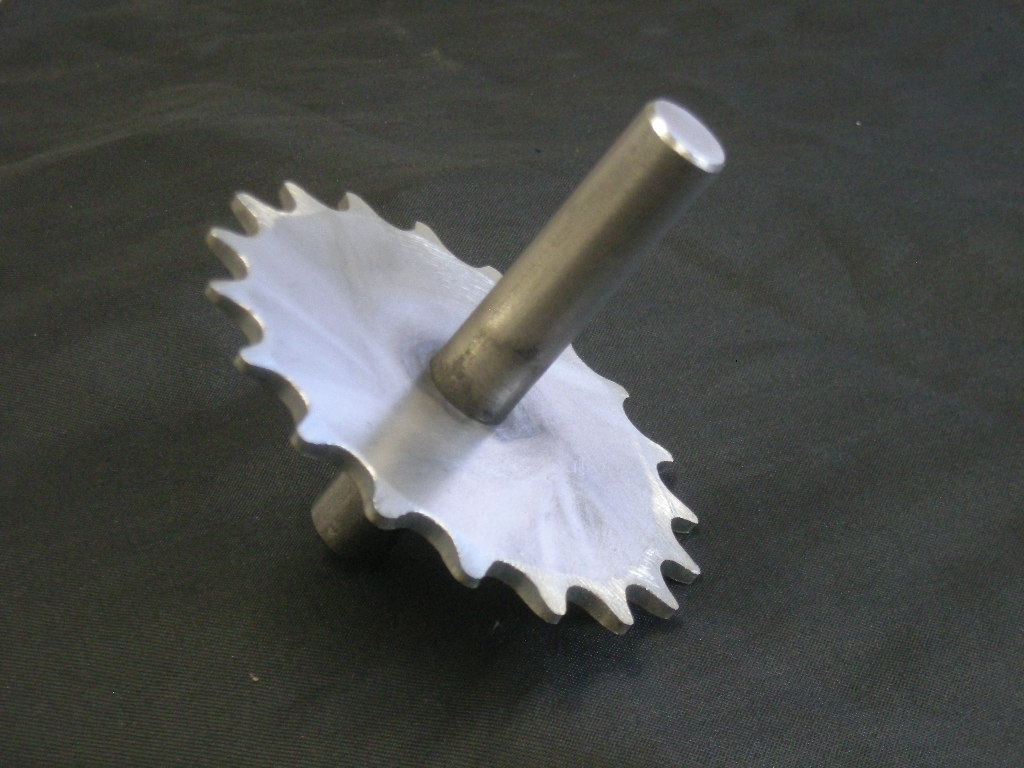
3 inch gear
axle shaft* assembly
Weld a 3 inch long x 1/2 inch diameter axle 1.125 inches from the end.
*Use a 1/2 inch
bolt shank, buy a long 1/2 inch bolt and cut off the head and
threads.
Drive gear bearing mount.
Use (2) 1/4-20 x 1 inch carriage bolts to mount this bracket.
Drill mounting bracket.
Use (1) 1/4-20 x 1 inch carriage bolt to mount the trigger lock
bracket and (2) 1/4-20 x 1 inch carriage bolts to mount the drill
bracket.
Base. (2) 8 x 3/8 bolts, nuts
or equivalent to connect the base halves together.
<
See this drawing for a bending guide.
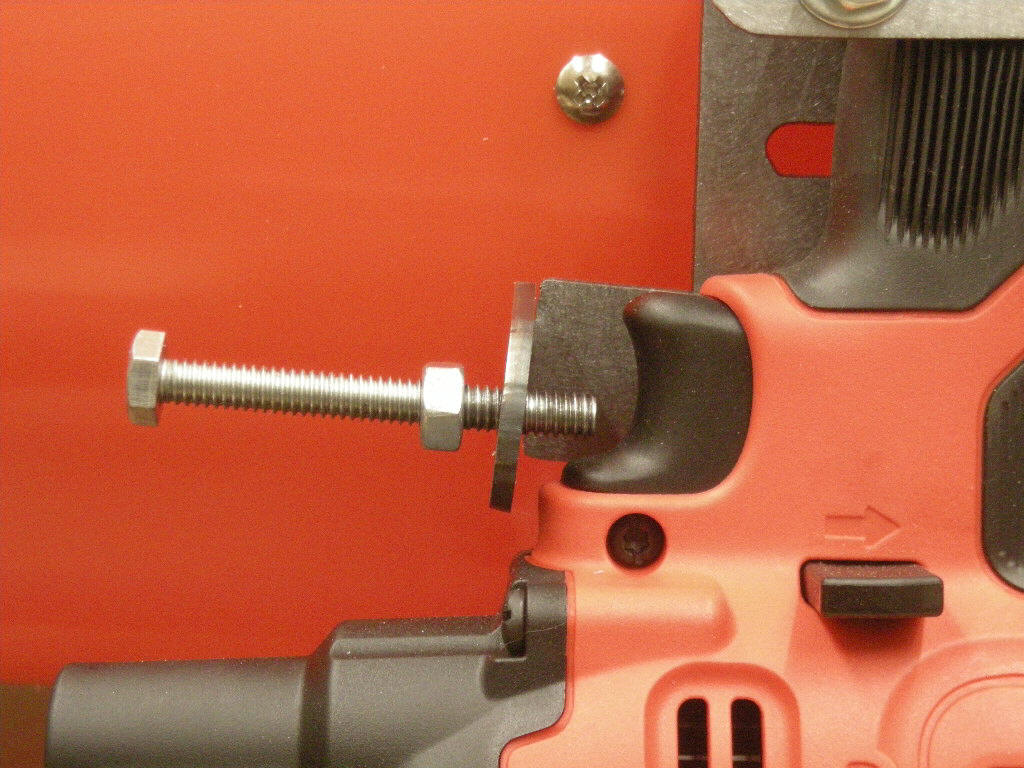
Drill
handle clamp, requires (2) 2 inch x 1/4-20 carriage bolts, washers,
nuts. I drilled a hole in the 'direction' switch and inserted a key
ring so I could pull on this switch.
Drill trigger lock.
Requires (1) 2 inch x 1/4-20 bolts (no shank), and nut
(2) 1/2 inch I.D. shaft collars with set screws
(www.Grainger.com)
Optional
(improved) screw-off lid. Available at Home Depot
De-burring media. We have had good luck
with media from Harbor Freight mixed 50/50 with 80 grit sand
blasting sand (50% media mixed with 50% sand)
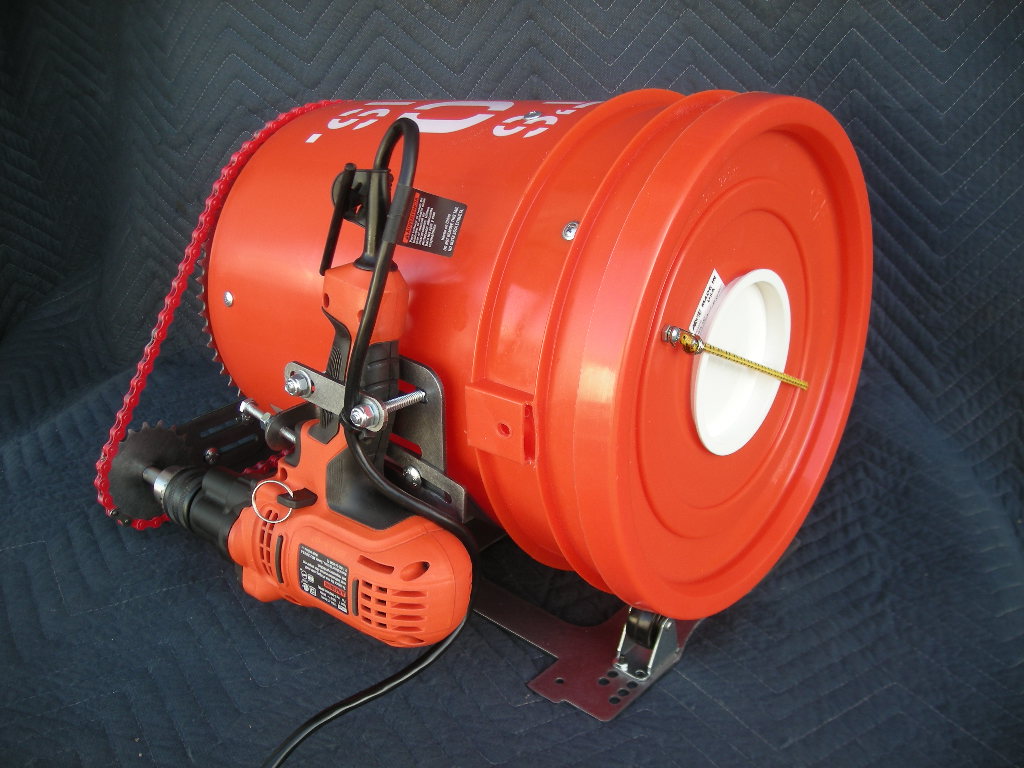
BACKGROUND: We plasma cut a lot of parts like steel tabs and large
washers. The cheap vibrator type tumblers and roller driven tumblers
were just not effective and could NOT handle the heavy steel parts
so..... we designed our own heavy duty chain driven tumbler. This tumbler design
was
so effective that we decided to share it.
Capacity is not officially rated, however, the tumbler
is specifically designed for heavy loads. It can easily accommodate 50 large 3 inch x 3/16 steel parts (plus the
de-burring media).
OVER HEATING: Running your tumbler too slow may also cause
overheating. Drill motors have an internal fan that needs to
turn at least fast enough to exhaust the hot air from inside the
drill. Check your drill for overheating and adjust the load or speed
if required. Point an external fan at the drill if needed on hot
days to keep the motor cool and extend the life of the drill motor.
Keep the drill clean and blow it out routinely to remove any dust
build-up. Run tumbler slowly, approx. 60 rpm.
REVERSE MECHANISM. The Black and Decker
has a reverse switch. Be sure the switch is fully engaged.
CHAIN ALIGNMENT: Be sure
the chain engages the gears smoothly and adjust the drill mounting
brackets as required to insure that the gears and chain are all
properly aligned. A mis-aligned chain will tend to 'click' or even
jump off the gears.
TUMBLING HEAVY LOADS: We have found that when the tumbler is first
loaded with a extremely heavy load, the drill may turn slowly or
unpredictably until the bucket has turned several revolutions and
the load has been evenly distributed. THIS IS NORMAL. Once the load
has been distributed evenly the speed will even out and may
increase. Adjust speed downward as needed. If you run the tumbler
too fast, you'll hear the parts bumping around (like tennis shoes in
the clothes dryer). When you find the correct speed you'll hear more
of a constant "whooshing" sound.
WARNING: Never leave machinery operating unattended. Keep clothing,
long hair, fingers, and jewelry away from moving parts. Keep pets
and children away from equipment when operating. Unplug from the
power source when not in use.
Don't run the tumbler empty. If you do, hold your finger on it to create a
little drag, otherwise it will run too fast. Still running a little fast in this
video. Proper speed loaded will be about 60 RPM (once it's loaded you can adjust
the speed to run it a little slower).


.JPG)

.JPG)
.JPG)
.JPG)
.JPG)
.JPG)
.JPG)
.JPG)
.JPG)
.JPG)
.JPG)
.JPG)
.JPG)
.JPG)
.JPG)
.JPG)
.JPG)
.JPG)
.JPG)